TOP

我的荣耀 开启荣耀之旅

How to Take Pictures of Northern Lights with Smartphone: Guide 2025
The ethereal beauty of the Northern Lights is a celestial spectacle that leaves us in awe. As you stay bathed in the grand and magnificent display of evolving light drapes or arcs, you’ll want to immortalize these moments by capturing the beauty of the Northern Lights with your smartphone. But how to take pictures of Northern Lights with smartphones?
In this blog, we’ll outline the detailed steps toward perfect Northern Light photography. From picking the right time and location to choosing an ideal smartphone, we’ve got you covered. Moreover, we’ll introduce some tips to help you get the perfect shots that’ll make you relive those awestruck moments even years after. Dive right in now!
How to Take Pictures of Northern Lights with Smartphones?
It can be a rewarding yet challenging experience to capture the breathtaking Northern Lights with your smartphone. Here's a comprehensive guide to help you take stunning pictures of this natural phenomenon using smartphones.
Pick the Right Time
Timing is crucial when capturing the Northern Lights. Optimal conditions typically occur during the dark, clear nights of fall and winter, generally between September and next April. Aim for periods of high solar activity, such as during solar storms, for increased visibility. Plan your shoot during the late evening or early morning hours when the sky is at its darkest, providing a perfect backdrop for the vibrant light display.
Find the Right Location
Choosing the right location significantly impacts the quality of your Northern Lights photos. Typically, the best regions to spot the Northern Lights are between 66°N and 69°N latitude, including Norway, Finland, Scotland, Northern Canada, Iceland, Alaska, and so on. Moreover, remote areas that are farther away from the city are best for Northern Light photography since they are unaffected by city lights and provide a perfectly dark backdrop for your photos.
Follow Local Northern Lights Forecast
Stay ahead of the game by keeping a close eye on local Northern Lights forecasts. Numerous apps and websites provide updates on solar activity and Aurora predictions. However, it's better to check regional Aurora forecast websites specific to your location. These platforms provide detailed information about the anticipated location and intensity of the Northern Lights, typically with a forecast available several hours in advance. Plan your photography sessions based on these forecasts to maximize your chances of witnessing and capturing the Northern Lights.
Choose Smartphones with the Best Cameras

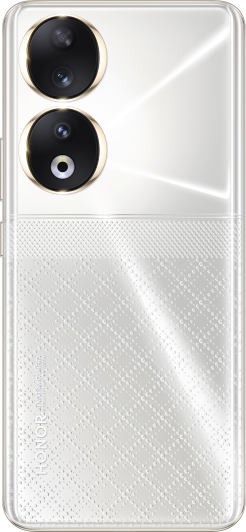
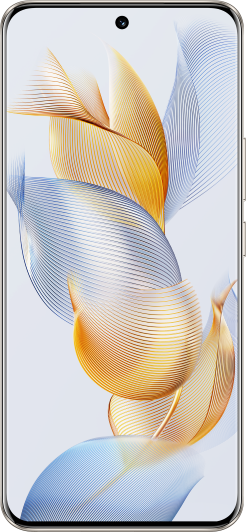
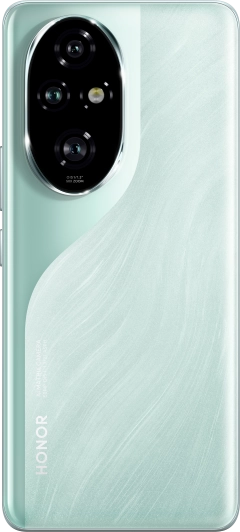
Perfect photos are not possible without the perfect cameras. To capture the intricate details and colors of the aurora borealis, opt for smartphones with top-tier cameras. A great recommendation is the HONOR 90, an excellent camera phone. Its triple rear cameras boast 200MP high resolution and f/1.9 wide aperture, which is well-suited to capture the mesmerizing beauty of Northern Lights to the fullest degree.
What Are the Best Android Camera Settings for Northern Lights?
Capturing the Northern Lights with an Android smartphone requires specific camera settings to ensure you capture the beauty of this natural phenomenon. So, how do I take pictures of Northern Lights with Android phones? While different Android smartphones may have slightly different settings, here's a general guide:
Manual Mode (Pro Mode)
Use your smartphone's manual or pro mode to have more control over settings. This is crucial for adjusting parameters like exposure time, ISO, and focus.
ISO Settings
Set the ISO to above 1600 to increase your camera’s light sensitivity for enhanced photo clarity. However, note that a high ISO can also cause more grain in your photos. In this case, gradually decrease the ISO to the point where the photo is clear enough without having much noise.
Adjust the Aperture
The aperture, also known as the f-stop, manages the openness of the lens. A broader aperture permits increased light entry into the camera, a critical factor for capturing the Northern Lights. Adjust the aperture to f-2.8 or lower if your lens permits. It's important to note that a lower f-stop number indicates a wider aperture.
Exposure Time (Shutter Speed)
Use a longer exposure time to capture the light of the Northern Lights. Start with a few seconds (e.g., 5-10 seconds) and adjust as needed. A tripod or stable surface is essential for longer exposures to prevent camera shake.
Focus
Northern Lights occur hundreds of kilometers from the ground, and auto-focus can struggle in low-light conditions, so you should basically set the focus manually to infinity.
White Balance
Set the white balance of your camera to around 3500 Kelvin. This can lend a more natural color to the Northern Lights.
Turn Off Flash
Disable the flash as it won't contribute positively to capturing the Northern Lights and may interfere with the natural lighting.
Other Tips for the Perfect Shot of Northern Lights
Apart from making the preparations above, there are some additional tips to enhance your chances of capturing stunning aurora photographs:
Check Weather Conditions
Keep a close eye on weather conditions, including cloud cover and solar activity. Clear skies are essential for Northern Lights visibility, so choose nights with a low likelihood of clouds.
Dress Warmly
Northern Lights photography often involves spending extended periods in cold environments. Dress warmly, and consider bringing hand warmers to keep yourself comfortable during the shoot.
Remote Shutter Release
If possible, use a remote shutter release or your smartphone's timer function to avoid touching the device during the exposure. This reduces the risk of introducing vibrations that can affect image sharpness.
Learn Post-Processing Techniques
Familiarize yourself with basic post-processing techniques to enhance your Northern Lights photos. Adjustments to exposure, contrast, and color balance can bring out the full beauty of the aurora.
Conclusion
With the right smartphone and photography know-how, you can turn your device into a powerful tool for capturing the mystical beauty of the Northern Lights. From choosing the best camera settings to following forecasts, each element contributes to your success. So, equip yourself with these insights on how to take pictures of northern lights with smartphones, head to a dark, open space, and let your HONOR 90 unveil the breathtaking spectacle of the celestial light show today!
FAQ
Can you take pictures of the Northern Lights with a phone?
Definitely. Modern smartphones like the HONOR 90 are often equipped with sophisticated cameras that can rival many digital cameras in picture quality. Moreover, in terms of portability, camera phones are the clear winner, making them the perfect solution for Northern Light hunting which often involves long-distance traveling.
Do you need a tripod to photograph the Northern Lights?
A tripod is not mandatory for Northern Light photography, but it greatly enhances photo quality. Since the Northern Lights are photographed at night, the exposure time has to be longer, making the photo particularly sensitive to camera shaking. In this case, a tripod ensures stability and prevents blurriness.
What shutter speed should you use for Northern Lights?
The optimal shutter speed for photographing the Northern Lights is primarily determined by the intensity and movement speed of the aurora. For bright and fast-moving auroras, a shutter speed of 1-5 seconds is advised. On the other hand, if the aurora is dim and moves slowly, set it to 20-30 seconds instead.
Source: HONOR Club
Consumer hotline
0807777715 Monday to Sunday, 8:00am-8:00pm
za.support@honor.com
We use cookies and similar technologies to make our website work efficiently, as well as to analyze our website traffic and for advertising purposes.
By clicking on "Accept all cookies" you allow the storage of cookies on your device. For more information, take a look at our Cookie Policy.
Functional cookies are used to improve functionality and personalization, such as when playing videos or during live chats.
Analytical cookies provide information on how this site is used. This improves the user experience. The data collected is aggregated and made anonymous.
Advertising cookies provide information about user interactions with HONOR content. This helps us better understand the effectiveness of the content of our emails and our website.


